Mediterranean Immune Boosting Protein Bowl

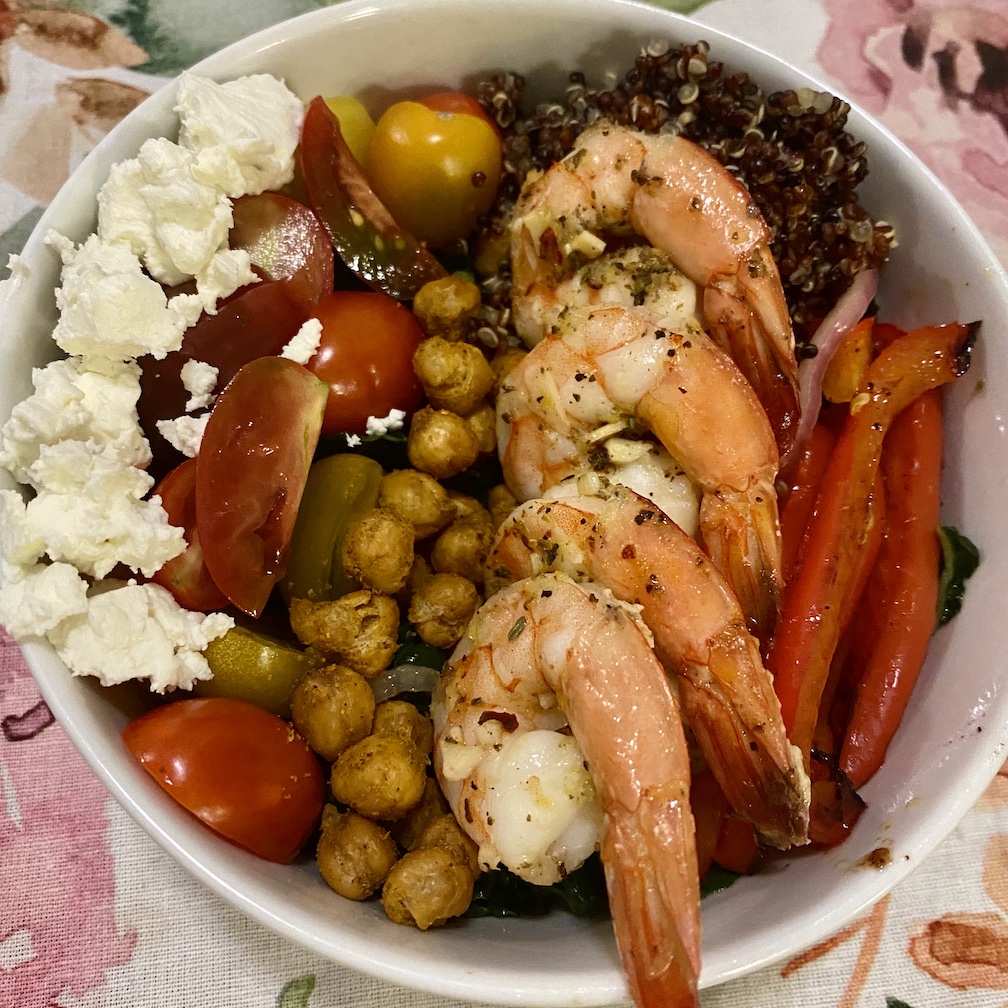
Our Mediterranean Immune Boosting Protein Bowl is a meal that is not only delicious, but is packed with vitamins and nutrients to keep you healthy. Like most everyone this week, we were thinking of what we could make with what we already had in our homes. Then we researched which foods were the most nutrient dense and specifically good for your immune system (let’s be honest, we could all benefit from an immune system boost right about now). Turns out a red pepper has more Vitamin C than an orange, and shellfish are loaded with zinc! Garlic and turmeric are also found on the list of top 15 immune boosting foods and for us, we both had those things already in our kitchens!! To fill out the bowl we cooked some quinoa in chicken broth and made a lemon vinaigrette kale salad. There are a lot of individual components to this dish that have to be made separately, however, some can be done ahead of time to help with the prep. It also enables you to customize the bowl however you want, using what you have on hand. Marisa didn’t have feta so she used goat cheese and rice, farro, or lentils could be substituted for the quinoa if needed. All in all this was a meal that not only tasted great, with bright fresh flavors, but was also good for you!

Mediterranean Immune Boosting Protein Bowl

This bowl is a delicious way to get your vitamins and minerals.
No ratings yet
Print Pin
Course: Main Course
Cuisine: Mediterranean
Keyword: bowl, immune boosting, kale, protein, salad, shrimp
Prep Time: 30 minutes
Cook Time: 30 minutes
Total Time: 1 hour
Servings: 4
Calories: 910kcal

Equipment

  • sheet pans
  • microplane

Ingredients

  • 8 oz kale julienned or chopped
  • 1 lemon zeste and juices (about 1/4 cup)
  • 1/4 cup champagne vinegar
  • 1/2 cup olive oil
  • 1 tsp Dijon mustard
  • 1 tsp dried oregano
  • 1 tsp salt
  • 1/2 tsp pepper
  • 1 shallot sliced thin
  • 15 oz garbanzo beans drained and rinsed
  • 1/2 Tbls olive oil
  • 1/4 tsp turmeric
  • 1/4 tsp garlic powder
  • 1/4 tsp salt
  • 1/4 tsp pepper
  • 2 cups chicken broth
  • 1 cup quinoa
  • 2 Tbls olive oil
  • 2 cloves garlic minced
  • 1 tsp dried oregano
  • 1/4 tsp hot pepper flakes
  • 1 tsp salt
  • 1/2 tsp pepper
  • 1 lb. shrimp cleaned and shelled
  • 1 red pepper cut in strips
  • 1/2 pint cherry tomatoes halved
  • 4 oz. feta cheese

Instructions

1. Place kale in a large bowl. In a small bowl or measuring cup, add the juice of one lemon (save the zest for later use in the shrimp marinade), vinegar, olive oil, Dijon mustard, oregano, salt and pepper. Whisk together and then add the shallots. Pour into the kale about 1/3 of the vinaigrette and with your fingers massage the vinaigrette into kale. This will take about 3 or 4 minutes and the kale will soften more as it rests. Set aside.

    2. Preheat oven to 400 degrees. Place a dry towel on top of a small sheet pan. Rinse and drain the garbanzo beans and then pour them onto the dry towel. Try to dry them off by moving them around on the towel and blotting the moisture from the beans. When they are dry, remove the towel and place directly onto the pan. Drizzle over the olive oil, mix with hands, and place in oven for for about 25 minutes. Shaking half way through.

      3. Rinse the quinoa. In a medium saucepan, add chicken broth and rinsed quinoa. Bring to a boil over medium high heat, reduce heat to a simmer, and cook uncovered for about 20 minutes or until most of the liquid is absorbed. Move off the heat and cover for 5 minutes.

        4. In a medium bowl, mix olive oil, lemon zest, garlic, oregano, hot pepper flakes, salt and pepper. Toss red peppers in marinade and then lift out and place onto large baking sheet. Then using rest of marinade, place shrimp and toss. Place onto baking sheet with the peppers. Roast in 400 degree oven for 10 to 13 minutes with the garbanzo beans. When placing in oven give the beans a shake. Remove both the beans and the shrimp. Set shrimp and peppers aside. Place the garbanzo beans in a bowl and toss with the seasonings.

          5. Halve tomatoes and crumble feta or goat cheese. Set aside.

            6. Into four serving bowls, divide kale. On top of kale, divide and place the shrimp, quinoa, garbanzo beans, roasted red peppers, tomatoes, and feta. Drizzle on the lemon shallot dressing.

              Nutrition

              Calories: 910kcal | Carbohydrates: 72g | Protein: 47g | Fat: 50g | Saturated Fat: 10g | Cholesterol: 311mg | Sodium: 2992mg | Potassium: 1279mg | Fiber: 13g | Sugar: 10g | Vitamin A: 7033IU | Vitamin C: 149mg | Calcium: 485mg | Iron: 10mg


              Roasted Shrimp and Corn Pasta

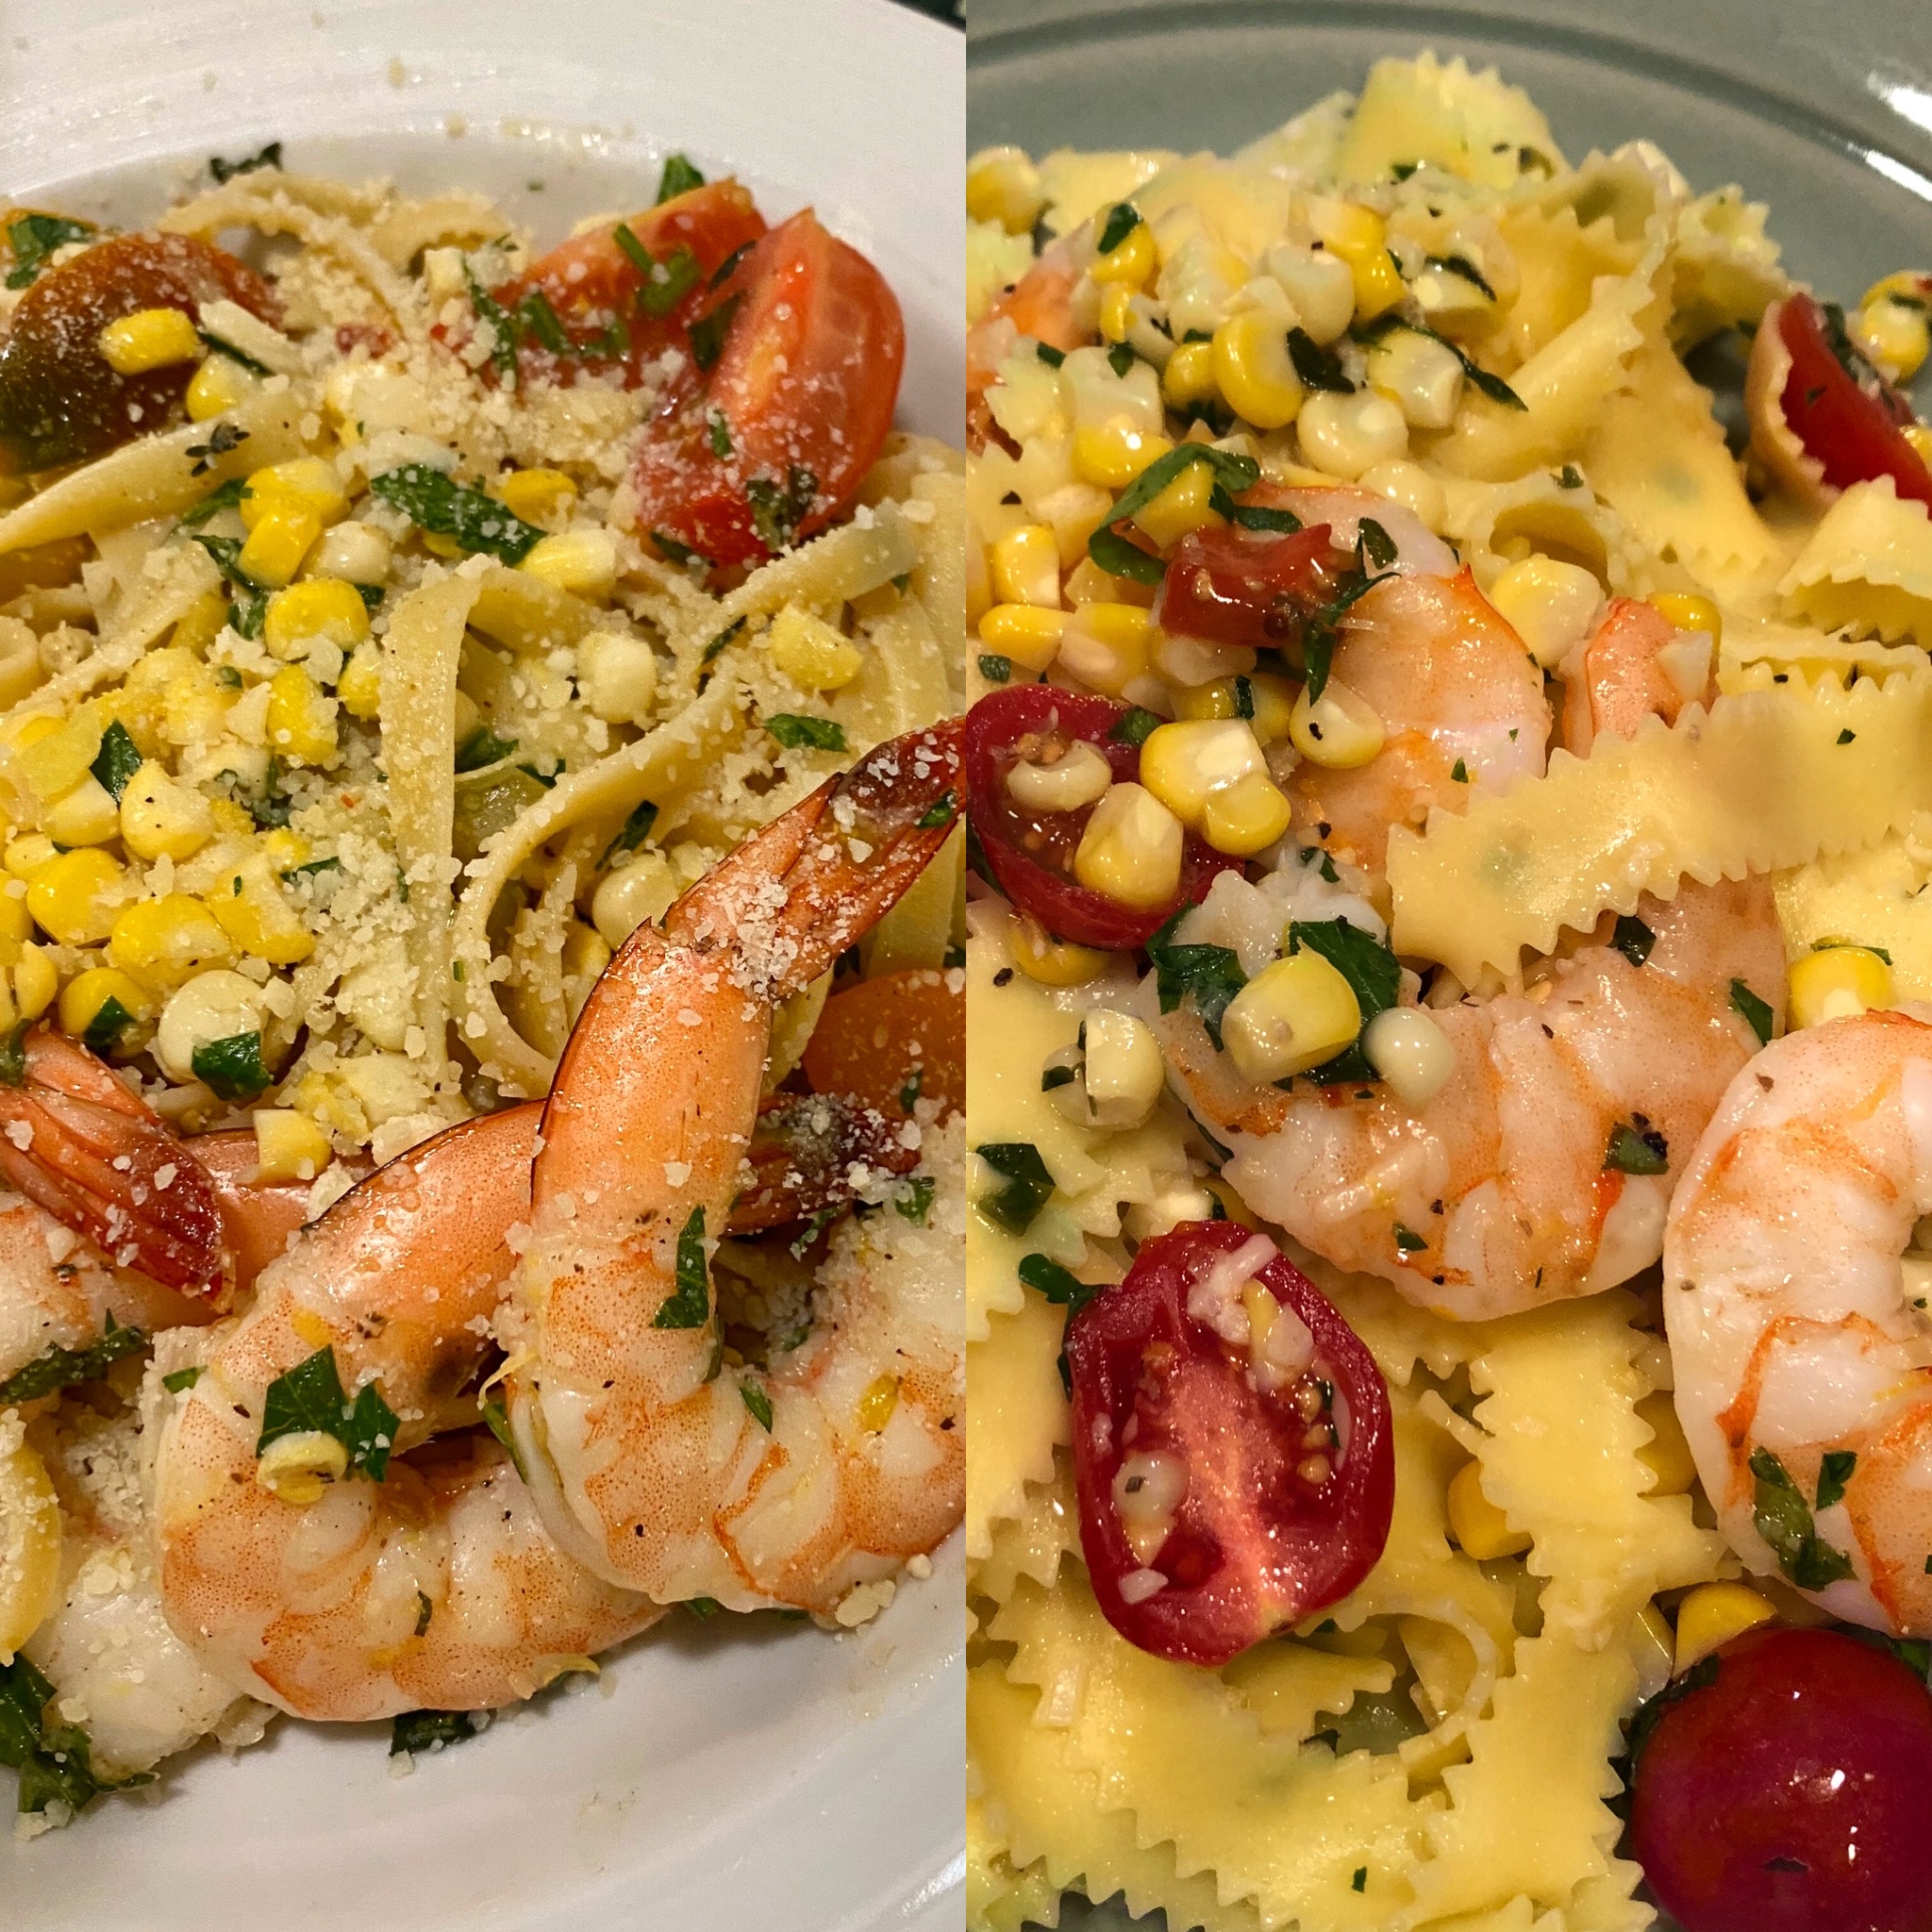
              Even though Marisa has a busy week and an especially busy Thursday, we still made time for cooking together.  This week we cooked on Wednesday and since she gets home later that day, we came up with a quick and easy pasta dish that can be prepped ahead if needed and comes together at dinner time fast!  Our Roasted Shrimp and Corn Pasta made a delicious dinner.  We decided to marinate the shrimp and corn and roast it together in the oven while we boiled the pasta and cut up the tomatoes and herbs.  Marisa put everything in the pan in the morning and refrigerated it and then just took it out and slipped it in the oven.  Mary put it together just right before roasting it and then we finished the recipe together.  Roasting the shrimp, which only takes 10 to 12 minutes, keeps them moist and plump and the corn is cooked but still has a bite.  Give this quick dish a try.  Check out our recipe below.

              Roasted Shrimp And Corn Pasta

              This pasta dish comes together in under 30 minutes and the shrimp can be prepped ahead so dinner time can be ready even faster!
              No ratings yet
              Print Pin
              Course: Main Course
              Cuisine: American
              Keyword: pasta, quick, shrimp, weeknight
              Prep Time: 15 minutes
              Cook Time: 15 minutes
              Total Time: 30 minutes
              Servings: 4
              Calories: 341kcal

              Equipment

              • Braiser
              • Zester
              • Oven Proof Skillet

              Ingredients

              • 3 Tbls butter divided
              • 2 Tbls olive oil
              • 1 1/2 Tbls minced garlic 4 or 5 cloves
              • 1 tsp fresh thyme minced
              • 1/4 tsp hot pepper flakes
              • 1 lemon
              • 1 1/2 lb. shrimp shelled, tails off
              • 3 ears fresh corn
              • 1 tsp salt
              • 1/2 tsp pepper
              • 8 oz. tagliatelle pasta
              • 1/2 pint cherry or grape tomatoes halved
              • 1/4 cup minced fresh parsley
              • 1/4 cup minced fresh basil
              • 1/4 cup Parmesan Cheese plus more for serving, if desired

              Instructions

              • Preheat oven to 400 degrees and place a large pot of water on high heat to come to a boil for the pasta.
              • In oven proof skillet, over low heat melt 2 Tbls butter, add olive oil, minced garlic, thyme, and hot pepper flakes. When you can smell the garlic, remove from heat and zest the lemon into the mixture. Set aside to cool.
              • Cut the kernels off the cob and add them to the melted butter mixture. Add in the shelled shrimp and sprinkle with the salt and pepper. Stir until the shrimp is coated with the butter mixture. Dot on the last Tbls of butter on top.
              • Preheat oven to 400 degrees, roast shrimp and corn for 10 to 12 minutes or until shrimp have turned pink and are cooked thru.
              • While the shrimp is in the oven, boil the pasta according to package directions until al dente. Reserve a cup of the pasta water. Drain and set aside.
              • When shrimp are done, remove pan from oven and juice the lemon onto the shrimp. Then add the tomatoes, parsley and basil. Give a stir and add the pasta, top with half of the Parmesan and mix with tongs until the pasta is coated with the butter garlic sauce. You can add in some pasta water if needed to thin out the sauce.
              • Top with more Parmesan.

              Notes

              If you want, you could prepare the shrimp ahead through step 3 and refrigerate until ready to cook dinner. Can be refrigerated for up to 8 hours.

              Nutrition

              Calories: 341kcal | Carbohydrates: 3g | Protein: 37g | Fat: 20g | Saturated Fat: 8g | Cholesterol: 455mg | Sodium: 2079mg | Potassium: 173mg | Fiber: 1g | Sugar: 1g | Vitamin A: 335IU | Vitamin C: 22mg | Calcium: 330mg | Iron: 4mg

              Coconut Shrimp Tacos

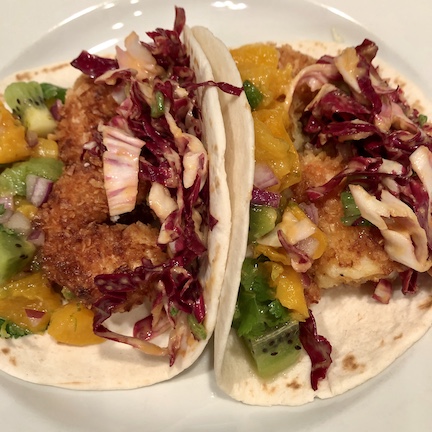
              Coconut Shrimp Tacos are on the menu tonight. We were in the mood to try our hand at Coconut Shrimp but didn’t know how we wanted to use them. Then, an old friend asked us when we were gonna make shrimp tacos because they were one of her favorites and Coconut Shrimp Tacos were born. Keeping with our Asian flavor profile from last week, we decided to dress the tacos with a Peanut Radicchio Slaw and a Sweet and Spicy Apricot Salsa. The result is a taco that hits all the right notes, it’s sweet, savory, and spicy. A delicious fusion of flavors.

              Coconut Shrimp

              16 large or jumbo shrimp

              1/2 cup flour

              1/2 tsp salt

              1/4 tsp pepper

              2 eggs

              1 tsp Franks buffalo sauce (or your favorite hot sauce)

              3/4 cup unsweetened coconut

              1/2 cup panko

              1/2 tsp salt

              Coconut Oil (to cover 1/4 inch in bottom of pan)

              8 flour taco tortillas

              Sweet and Spicy Apricot Salsa

              5 fresh or 5 canned apricots

              1 kiwi, diced

              1/4 cup red onion, diced

              1 lime, zested

              1/2 lime, juiced

              1/4 cup cilantro leaves

              1/4 tsp red pepper flakes

              Peanut Radicchio Slaw

              1/2 head radicchio, shredded

              2 green onions

              2 Tbls creamy peanut butter

              3 Tbls rice vinegar

              1/2 lime, juiced

              1 1/2 tsp soy sauce

              1 tsp honey

              1 tsp sriracha

              1 clove garlic, grated

              1 tsp sesame oil

              Directions

              1. In a small food processor, grind the coconut until it’s about the same size as the panko.
              2. In one of three shallow dishes, combine flour, salt and pepper. In second dish, beat together two eggs and hot sauce, and in third dish, mix coconut that you processed along with the panko and salt.
              3. Coat shrimp with flour mixtures, dip into egg mixture, and coat in coconut panko mixture. Place on plate and repeat until all shrimp are coated. Place shrimp into refrigerator to chill until ready to fry.
              4. In a medium bowl, combine apricots, kiwi, red onion, the zest of the lime along with the juice of 1/2 of the lime, cilantro, salt, and red pepper flakes. Set aside.
              5. In another medium bowl, combine the slaw ingredients, then shredded radicchio and green onions. Set aside.
              6. In a small bowl, mix the peanut butter, rice vinegar, juice from the other half of lime, soy sauce, honey, sriracha, garlic, and sesame oil. Whisk together and drizzle over slaw and toss together.
              7. In a large sauté pan, pour in enough coconut oil to measure about 1/4 inch deep. Heat over medium high heat until hot. Gently add half of shrimp to pan and fry for about 1 or 2 minutes or until the coating turns a golden brown and the shrimp is turning pink. With tongs, turn shrimp over and brown on other side which should take about another minute or so. Drain on a plate covered with a paper towel so any excess fat can drip off. Fry other half of shrimp.
              8. Place tortilla on plate, put two shrimp per taco down middle of tortilla, spoon apricot salsa along side of shrimp and top with a little of the radicchio slaw. Enjoy!

              Garlic Butter Lobster Roll with Champagne Escarole Salad

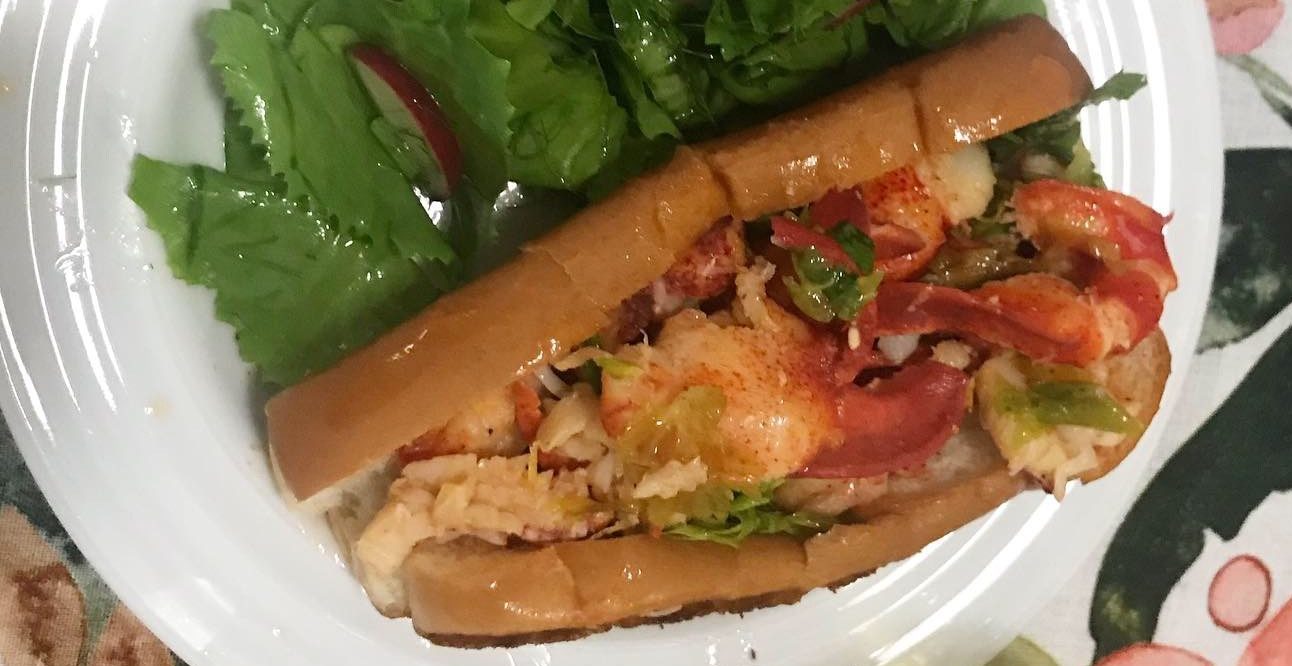
              One of the most iconic New England summer dishes. Our take on a warm buttery lobster roll includes a punch of garlic and whisper of celery leaves. We have paired it with our Champagne Escarole Salad which compliments the rich buttery lobster with a bright and slight bitterness.

              Makes 4 Servings

              For the Lobster Roll

              Ingredients

              4 split top hot dog buns

              1 stick unsalted butter, softened and divided

              1 clove garlic, minced

              1 tsp lemon zest

              2 Tbls celery leaves

              4 or 5 lobster tails, depending on size

              1/2 tsp salt

              1/4 tsp pepper

              lemon wedges

              Directions

              1. Over medium high heat steam lobster tails 8 to 10 minutes or until shells turn a bright red. Take out and let cool until you can handle them.

              2. Meanwhile, heat skillet over medium heat. Butter sides of hot dog buns and fry until toasted on both sides. Set aside.

              3. Heat 1/4 cup butter in small skillet until melted. Add minced garlic and let sit while you shell the lobster tails.

              4. Remove lobster meat from shells, leaving in large chunks and place into bowl. Pour over butter mixture and sprinkle on celery leaves, salt and pepper. Mix gently and then divide between the four toasted hot dog buns. Squeeze over juice from a wedge of lemon.

              For the Salad

              Ingredients

              1 head escarole, chopped into bite size pieces

              4 radishes, thinly sliced

              1/4 cup fennel fronds, roughly chopped

              1/3 cup champagne vinegar

              1/3 cup olive oil

              2 tsp Dijon mustard

              1 small shallot, minced

              1/2 tsp salt

              1/4 tsp pepper

              Directions

              1. Combine escarole, radishes, and fennel fronds in large bowl or platter. 

              2. Combine the remaining ingredients in a small bowl and whisk together. Pour over salad and toss to combine.

              Marisa:

              Living in Massachusetts means being surrounded by lobster rolls during the summer months. However, they usually have a pretty high price pointe and are rather indulgent. So we thought, why spend all that money on one lobster roll as when you could spend a fraction more and feed the whole family with lobster rolls?! We chose a warm buttery lobster roll because we both thought that it would highlight the flavors of the lobster best. Nothing against the cold mayo based roll, but warm butter just seemed a lot more inviting and simple.

              I bought frozen already cooked lobster because I actually had trouble finding live lobsters this week! I went to two or three stores and when I had no luck I went with the frozen. Honestly though, it tastes just as amazing and is even easier. No need to kill and shuck the lobster, just thaw and heat in a garlic and butter bath, less work and no flavor sacrifice!

              The salad is a great compliment to this rich sandwich. We thought, what better to go with lobster than champagne? Ok, well maybe not actual champagne, but a champagne vinegar to bring that same brightness and slight sweetness to our salad. Escarole is the perfect counterpoint to that, add some radishes and you have a crisp salad perfect to be enjoyed along side our lobster. It too comes together quite quickly and the vinaigrette is super simple to make ahead and keep stored in your refrigerator for up to two wee